

Improper charging is the #1 cause of vape battery degradation and safety incidents.
This short guide explains real charging risks and gives technical fixes you can use today.
When people ask “can a vape explode,” they usually mean battery venting, thermal runaway, fire, or a loud pop. Those are the realistic definitions of an explosion in this context.
Most reported incidents in the news trace back to lithium‑ion battery failure during charging, not the device shell. Heat buildup, wrong chargers, and poor supervision are common contributors.
We compiled this guide with SOKVAPE technicians using 2026 industry safety standards (CE/RoHS). We’ll cover how charging‑time heat starts, what a short circuit looks like, and safe habits to reduce fire risks.
This is a practical how‑to for the US, focused on Foger modular battery systems and Digiflavor BRK/Off Stamp pod + magnetic base setups. It helps beginners who are learning to charge disposables and experienced users handling multi‑part devices.
Key Takeaways
- “Explosion” usually means battery venting or thermal runaway, not the casing failing.
- Charging incidents are the most common cause of vape explosions reported in the news.
- Use certified chargers and avoid DIY wiring; we explain safe alternatives later.
- Simple habits—surface, supervision, and correct power source—cut risks sharply.
- Follow CE/RoHS 2026 guidance from SOKVAPE for safer vaping and longer battery life.
Safety Disclaimer
Safety Disclaimer: This guide is for informational use only and does not replace your device manual or professional help after an incident.
This section tells you what to watch for and how to stop charging safely. Read and follow the manufacturer instructions for your specific cable, charging base, and device. We recommend charging on a clean, flat surface away from flammables and staying with the charging setup.
Stop charging immediately and unplug if you notice any of the following: heat that is more than mildly warm, a sweet or chemical odor, swelling or bulging, hissing, sparking, melted plastic, or any physical damage.
Damage examples include crushed housings, bent USB ports, torn battery wraps, corrosion from water, or loose internal parts. Do not keep charging to “see if it finishes.” Continued charging often worsens failures.
If you suffer burns or other injuries, seek medical care right away. We focus next on preventing the conditions that create dangerous heat and short circuits for your vape device and other devices.
Why Charging Fails and What “Explosion” Usually Means
Many serious incidents start with a battery failure that then produces heat, smoke, or venting.
The real risk is the cell, not the shell
Think battery-first. Faults in lithium-ion batteries—internal defects, aging, or physical damage—drive most reported events.
Regulated devices reduce risk, but they do not remove it.
How overheating begins while charging
Overheating shows as a device that becomes hot during charging, strange indicator lights, or uneven charge speed.
Poor cables, high input current, blocked vents, and charging on insulating surfaces trap heat. That buildup can push the cell toward thermal runaway.
Short circuits and metal contact basics
A short circuit happens when current finds an unintended path. Contact from keys or coins can bridge terminals and cause a sudden current spike.
Dented cells, torn wraps, liquid in ports, or corrosion increase short risk and may lead to fire or burns.
“Loose batteries in pockets or wet devices before charging are common, high‑risk scenarios in incident reports.”
| Failure Mode | Common Cause | Immediate Sign |
|---|---|---|
| Cell defect | Manufacturing flaw in lithium-ion batteries | Rapid heating, odd smells |
| Short circuit | Metal contact, torn wrap, liquid | Sparking, sudden heat |
| Overcharge/High current | Wrong charger or cable | Very fast or stalled charging, hot housing |
Bottom line: avoid charging wet items, keep loose vape batteries separate from metal objects, and stop charging if you notice heat or unusual behavior. These simple steps cut the greatest risks to your devices.
Safe Charging Protocols to Reduce Fire and Explosion Risks
Proper power choices and habits sharply lower the risk of thermal events during charging.

Choose the right power source
Avoid high-voltage phone wall adapters. Fast-charge bricks can push conditions your device was not designed for and increase heat.
Use 5V/1A or a computer USB port when the manufacturer allows it. This gives a steadier, lower current that reduces stress on the battery.
Safe charging setup and habits
Charge on a clean, flat, non-flammable surface and stay nearby. Do not leave devices plugged in for very long after they reach full.
Replace frayed or loose cables immediately to cut resistance heating and intermittent contact.
Wet-device protocol and storage
If a device gets wet before or during charging, stop immediately, unplug, and move it to a non-flammable area. Do not attempt to charge until it is fully inspected and dried.
Never carry loose batteries with keys or coins in your pocket. Use a dedicated battery case to avoid a short circuit from metal contact.
| Rule | Why it matters | Quick action |
|---|---|---|
| Avoid fast phone adapters | Reduces excess heat and overcurrent risk | Use 5V/1A or PC USB |
| Attend while charging | Early detection of heat, odor, or swelling | Unplug if abnormal |
| Dry wet devices first | Water causes shorts and damage | Inspect and dry fully before charging |
- Checklist: correct power source, correct cable, stable surface, stay nearby, stop on heat/odor/swelling, store batteries protected.
How Long to Charge Your Vape (40-Word Answer)
Charging durations depend on battery capacity, charge-management circuitry, and charger output.
Most vapes take 30-90 minutes, depending on battery size and charger output. Charge on a flat, nonflammable surface using 5V/1A or a computer USB port. Stop when the indicator shows full, and unplug promptly to reduce heat risk.
Timing varies by mAh rating and how the device manages current. Smaller batteries finish near the low end of the range. Larger cells take longer.
Stopping when full and unplugging cuts sustained warmth at full charge. This habit lowers stress on the battery and reduces risk during idle periods.
- If charge time is far faster or far slower than usual, treat it as a troubleshooting signal and inspect cables, charger, and battery.
- See later brand sections for indicator-light meanings and base-system differences that change what “full” looks like on your device.
How to Charge Foger Devices Safely (Switch Pro and Modular Battery Devices)
With the Switch Pro family, charging is about modules as much as the body. You may be powering a removable module, the device chassis, or both. That changes the checks you must do before plugging in.
Understanding the modular battery setup
Foger modular systems separate the cell from the housing. That means contacts, fitment, and seals matter more than with sealed disposables.
Loose modules or dirty contacts raise short risk and raise heat. Always inspect connectors for e-liquid, lint, or corrosion.
LED charging indicator decoding
Red / Blinking — the unit is charging. Green / Off — the module is full; unplug it promptly.
Best practices to prevent damage while charging
- Inspect the port and module for debris or liquid.
- Connect to 5V/1A or a computer USB port for steady, lower power.
- Place the device on a flat, non‑flammable surface and watch for heat.
- Do not force connectors or charge with a bent port; keep the device upright.
- Disconnect when the LED shows Green/Off; do not keep modules trickle charging for long periods.
Signs the battery or module needs replacement
Typical lithium-ion life is 300–500 cycles, roughly 6–12 months depending on use and charging habits.
| Sign | Likely meaning | Action |
|---|---|---|
| Reduced runtime | Worn battery | Replace module |
| Stalls or never reaches Green/Off | Charging fault | Stop use; replace |
| Loose fit, bulging, odor, heat | Physical damage | Stop immediately; replace |
“Stop charging and replace the module if you see swelling, smell chemicals, or detect high heat.”
Safety first: make sure you stop using and replace the module rather than attempt DIY fixes that risk shorts or further damage.
How to Charge Digiflavor BRK/Off Stamp Devices (Pod + Battery Base System)
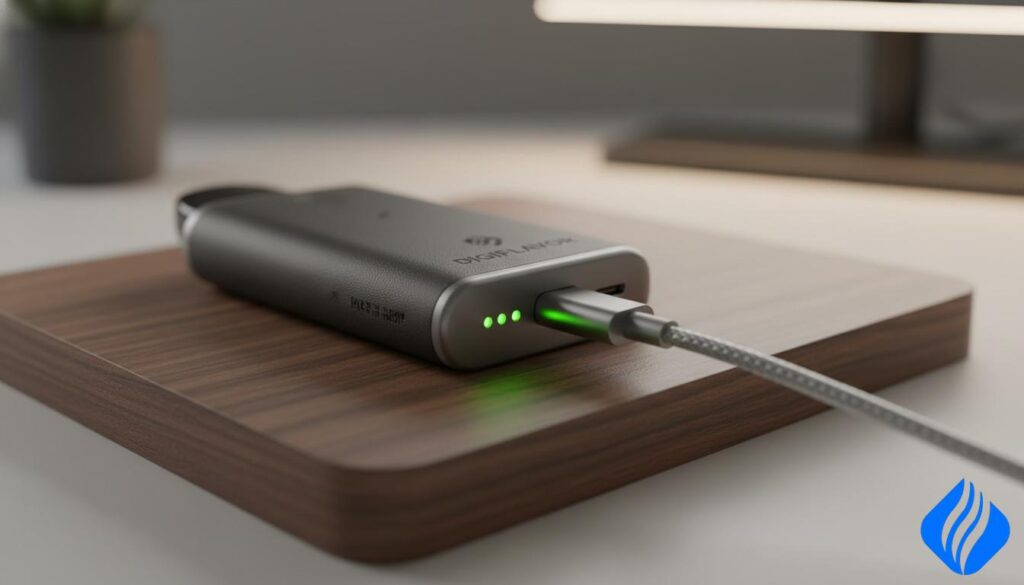
Digiflavor’s BRK/Off Stamp pairs a small pod with a larger magnetic base to extend runtime and simplify charging. The pod holds the 200mAh cell and the base houses a 1000mAh battery and the charging electronics.
How the two‑part architecture works
The pod contains the smaller cell, coil, and pads. The magnetic base supplies power and acts as the charger.
That means most charging issues trace to the base, not always the pod.
Charging path and alignment tips
The 200mAh pod charges via the 1000mAh magnetic base. Seat the pod fully until the magnets snap. Check that contact pads meet cleanly and lie flat.
- Keep pads dry and free of e-liquid or lint.
- Avoid twisting while seating; twisting can bend contacts.
- Do not use metal tools on contacts — that risks creating an unintended circuit or short circuit.
Troubleshooting steps if the pod won’t charge
- Verify the USB cable and power source first.
- Inspect base contacts for debris or corrosion.
- Check pod pads for damage or residue.
- Test with a known-good pod or base when possible.
When to replace base versus pod
Replace the base if it refuses to accept charge or fails with multiple pods. Replace the pod when only one pod won’t charge, leaks, or shows pad damage.
“Use the original base and compatible accessories to avoid poor contact, overheating, or charging instability.”
Safety reminder: charge on a clean, flat surface and supervise the process. Wet or corroded contacts increase the risk of damage and overheating.
Charging Without a Battery: What Not to Do and Safe Alternatives
Never attempt to energize a unit by wiring around the cell; that shortcut removes key protections.
Why DIY wiring and “without battery” hacks are dangerous
Bypassing the battery defeats built‑in protection circuits. Exposed leads or clipped contacts can create a short circuit instantly.
This leads to rapid heat, melted parts, and fire risk. Mechanical mods and improvised setups raise those risks further.
Safer option: use the original magnetic charging dock or a replacement base
Use the manufacturer dock or a model‑matched base. These parts preserve protection and correct current flow. That lowers overheating and failure odds.
How to choose compatible replacement parts without risking a short
- Match model name and connector type exactly (for example, BRK/Off Stamp base).
- Confirm magnet/contact layout and rated voltage/current.
- Avoid “universal” parts that do not list device compatibility.
- Safety checklist before first charge: no bent pins, no wobble, no exposed metal, no corrosion.
- If you detect odd heat or smell, stop and replace the part rather than attempt repair.
Short repairs increase hazard; replacing faulty batteries or bases is the safest option.
Vape Charging Troubleshooting Table
A few observable signs let you triage charging faults fast and avoid serious damage.
Use this quick reference: Symptom → likely cause → safer fix → stop-and-replace triggers. Act quickly and always prioritize safety.
Common symptoms, likely causes, and safer fixes
| Symptom | Likely cause | Safer fix | Stop-and-replace triggers |
|---|---|---|---|
| No LED while plugged in | Bad cable, dead charger, or base failure | Swap to a known-good cable and 5V/1A USB or PC port | Persistent dead port or visible burn marks |
| LED stuck on red / keeps blinking | Wrong power brick, dirty port, aging battery | Use 5V/1A, clean contacts with lint-free cloth, test module | Swelling, odor, or repeated failure after fixes |
| Charging very fast or very slow | Fast-charge adapter or cable resistance issue | Move to low-current source and a known-good cable | Overheating or charging that never reaches full |
| Device gets hot during charge | High input current, damaged wraps, or short | Stop charging, move to non-flammable surface, inspect | Hissing, melting, or persistent high heat |
| Intermittent charge when cable moves | Loose connector, frayed cable, port damage | Replace cable and avoid forcing plugs | Sparking, smoking, or exposed wiring |
| Pod won’t charge on magnetic base | Misalignment, debris on pads, dead base battery | Reseat pod, clean pads, charge base separately | Base fails with multiple pods or visible pad damage |
| Rapid runtime loss or stalls | Battery wear (300–500 cycles) or internal damage | Replace module or pod; use manufacturer parts | Bulging, chemical smell, or sudden failure |
Quick rules: never bridge contacts with metal or attempt DIY wiring. If you see swelling, sparking, hissing, melted plastic, or strong chemical odor, stop immediately and replace the affected part.
When in doubt, stop charging and choose replacement over repair to protect your safety and your device.
Conclusion
,Battery failures, not random faults, drive most severe incidents in vaping.
Most news reports tie serious explosions and fires to charging misuse, damaged cells, or wet contacts. Supervised charging, avoiding high‑voltage phone wall adapters, and using 5V/1A or a computer USB port cut risk sharply.
For Foger users, keep modules seated and contacts clean; Red/blinking means charging and Green/off means unplug. For Digiflavor BRK/Off Stamp, align the pod on the 1000mAh magnetic base and keep pads dry to avoid intermittent heat.
Never attempt DIY wiring or “without battery” hacks. Lithium‑ion batteries usually last about 300–500 cycles (roughly 6–12 years for some users); replace units showing swelling, odd odor, or rapid runtime loss.
Store cells in protective cases, avoid pockets with keys or coins, and never charge wet devices. These simple steps prevent most burns and fires and keep your vapes safer.
 English
  German
  Dutch
Dutch  Danish
  Czech
Czech  Italian
  Slovenian
  French
  Hungarian
  Spanish
  Polish