

Direct answer: Charge the device, check airflow, and clean the tank and pod contacts to restore proper vapor quickly. We speak as Sokvape consultants: safety first, then follow the numbered steps below for a fast fix and lasting prevention.
Frustration is normal when a device underperforms. Power delivery, airflow blockages, flooded wicking, incorrect wattage, or a spent coil can all cause poor output. Cleaning the tank often fixes contact issues and prevents residue from causing failures.
We will guide you through safe, numbered procedures that include coil handling, priming coils, and checking PG/VG balance. This short intro previews a troubleshooting map, battery safety notes, and travel compliance tips. If you need replacement coils or pods, Sokvape can help match parts safely—see our detailed cleaning steps cleaning guide.
Key Takeaways
- Charge, verify airflow, and clean contacts first for the quickest restore.
- Poor output can stem from power, coil wear, or wick flooding.
- Tank cleaning prevents flavor muddling and connection faults.
- Follow safety steps: never submerge batteries or coils.
- Sokvape provides parts and support to match coils and pods safely.
Direct Answer: The fastest fixes when your vape won’t hit
Quick action often restores normal draw in under two minutes. We recommend a short triage before any teardown. Start with simple checks that address power, airflow, and liquid level.
Quick check: charge level, airflow, and e-liquid level
- Charge: If the light turns on but output is weak, give the battery 15–20 minutes on the charger. A partial charge can show a light yet lack firing power.
- Airflow: Confirm the airflow slider is open and the mouthpiece is free of lint or condensation.
- E-liquid: Hold the tank or pod up to a light to check juice level. Low liquid causes weak vapor or burnt flavor.
Fast reset: reseat the tank/pod or cartridge connection
Remove and reseat the tank or cartridge. Clean the contact points, then seat flush—tight enough, not over-screwed. Over-tightening can misalign the 510 pin and cut power transfer.
“A quick reseat or a short charge fixes most lights-on/no-vapor cases.”
| Step | Action | Success sign |
|---|---|---|
| 1 | Charge 15–20 min | Stable vapor, normal draw resistance |
| 2 | Open airflow & clear mouthpiece | No gurgling, steady clouds |
| 3 | Reseat & clean contacts | Device fires, no error lights |
What “not hitting” actually means in vaping terms
First, we’ll label the core failure types—no vapor, weak vapor, and burnt hits—to speed diagnosis.
Lights on but no vapor vs. weak vapor vs. burnt hits
Indicator lights confirm the device receives an input, not that atomization happens. A light can flash while the coil fails to heat due to low battery, dirty contacts, or a flooded sensor.
Weak vapor usually points to restricted airflow, underpowered settings, or an aging coil that loses efficiency.
Burnt hits occur when the wick runs dry or the coil is overheated. Proper coil priming and correct wattage prevent this.
Atomization basics: coil, wicking, and airflow
Atomization is a system. The coil heats, the wick delivers juice, and airflow carries vapor out. If any part fails, clouds drop and flavor degrades.
How PG/VG ratio changes wicking speed and vapor output
Higher VG makes thicker liquid and stronger clouds but can slow wicking. Higher PG flows faster and soaks the wick quickly, but it may feel harsher.
“Match e-liquid thickness and power to your device’s wicking ports for best results.”
- Match power to coil resistance.
- Use lower-VG for tight wicking ports; higher-VG for wide wicking ports.
- Prime coils and allow saturation before firing.
Safety Warning: Lithium-ion battery safety before troubleshooting
Stop and inspect the battery before any hands‑on troubleshooting — safety comes first. If a lithium‑ion cell shows damage or abnormal heat, do not continue. We prioritize safety over quick fixes.
Signs of battery damage you should not ignore
If you see these, stop using the device immediately.
- Swollen housing, torn wraps on removable batteries, or visible leaking.
- Burning smell, hissing, repeated overheating during charge, or erratic LED signals.
- Charging port or cable that sparks, feels loose, or gets excessively hot.
Charging best practices and heat exposure risks
Charge on a stable, non‑flammable surface away from direct sun. Never leave a battery in a hot car or under bedding.
Use the manufacturer cable and approved charger. If the device will not accept a charge, do not force it. Faulty cables can damage cells and cut power.
When to stop using a device and replace the battery or kit
Replace the battery or the whole kit if misfires persist after cleaning, there is visible damage, or overheating repeats. Safety rules: if you doubt the cell, stop using it.
“Safety and legal compliance come first — a quick fix is never worth a battery incident.”
Troubleshooting map: symptoms vs. solutions at a glance
We made a compact map to help you match LED and symptom cues to safe first actions. Use it to diagnose an issue quickly, then follow the step-by-step fixes later in the guide.
LED behavior and what it typically indicates
LED patterns are cues, not full error reports. Simple lights can’t show a “check atomiser” message. Always inspect contacts and seating if the light seems normal but vapor does not follow.
| Symptom | Likely cause | Immediate safe action |
|---|---|---|
| Solid light on draw, no vapor | Insufficient charge or dirty contacts | Charge 15–20 min, clean contacts, reseat tank (see section 7–8) |
| Blinking light on draw | Low battery or error signal | Charge fully, then test; replace cable if erratic |
| Light but weak vapor / gurgling | Flooded coil or underpowered coil | Blow out excess liquid, clean mouthpiece, check wattage (see sections 11–13) |
| Burnt taste / tight draw | Dry wick or airflow blockage | Prime or replace coil, clear airflow holes, then test |
| Light on auto-draw, no fire | Blocked airflow sensor | Dry the sensor area, upright settle, reseat pod (see section 10) |
Start with the safe actions above: charge, clean, and reseat before deeper disassembly. That approach saves time and keeps power management safe for your device.
why is my vape not hitting even though the light turns on?
We know this is frustrating. A glowing LED only shows the device has power to light the indicator. It does not prove the coil gets enough current under load.
Not enough charge to properly fire the coil
The coil needs a surge of voltage to heat. A low battery can still power an LED while lacking the output to atomize. Charge briefly for 15–20 minutes and test before deeper teardown.
Dirty connector points blocking power transfer
Pocket lint, pooled e-liquid, or corrosion at the base can break the electrical path. Remove the tank or pod. Inspect the 510 and contact rings. Clean with a dry swab and retry.
Airflow detector blocked on draw-activation devices
Draw-activation devices rely on clear intake holes. Flooded sensors or a clogged mouthpiece can stop firing even with a lit indicator. Dry the sensor area and clear the mouthpiece, then attempt short puffs.
Quick safe sequence:
- Charge briefly.
- Remove and inspect connections.
- Dry and clean connector area, mouthpiece, and air intakes.
- Reseat and retest with short draws.
“If you detect heat, a burning odor, or visible damage, stop immediately and follow lithium‑ion safety steps.”
For exact numbered steps for charging and contact cleaning, continue to the next sections.
Step-by-step: Properly charge and power-cycle your vape device
Start with power management before any teardown. A short, controlled charge often restores full output and rules out power delivery issues.
Give it time: the 15–20 minutes rule
Charge the battery for at least 15–20 minutes before retesting. LEDs can light while the cell lacks the surge needed to heat the coil under load.
Button basics: lock, unlock, and firing checks
For button-activation units, try five rapid clicks to lock or unlock. After charging, press the button and take a short, controlled draw to test firing.
SOKVAPE pro-tip on charging habits
- Connect with a known-good cable and inspect the port for debris.
- Charge on a cool, flat surface; avoid hot cars or direct sun.
- If the device heats while charging, stop and unplug immediately.
- After a short charge, reseat the tank or pod and retest.
“Avoid constant short top-ups—micro-charging cuts long-term battery health and can cause inconsistent firing.”
If charging still fails, do not force power. Move to contact cleaning and consider cable or part replacement. For vape pen users, follow manufacturer guidance for safe disposal or service.
Step-by-step: Clean the tank/pod contacts and 510 connection
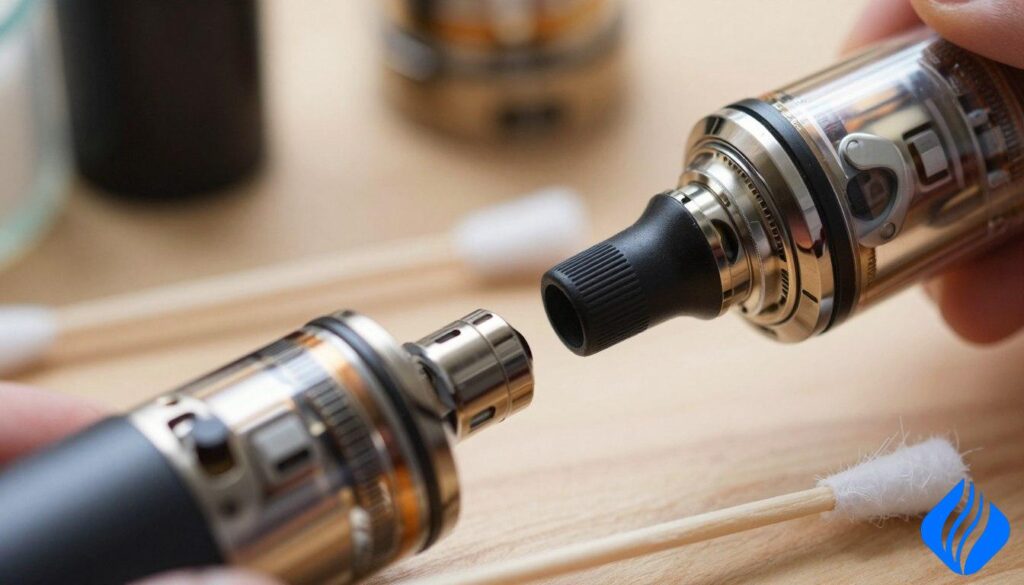
Quick, safe contact cleaning restores power transfer for most kits. First, detach the tank or pod and inspect the 510 connection and contact rings under clear light. Look for sticky e-liquid, lint, dark film, or corrosion that can block current.
Inspection and cleaning steps
- Remove the tank or cartridge and set the device upright on a clean surface.
- Absorb pooled e-liquid with a dry cotton swab, then wipe contact faces. Repeat until no residue lifts.
- Moisten a fresh swab with rubbing alcohol and clean the 510 connection and contact rings. Allow a few minutes to evaporate fully.
- Reseat the tank flush and snug. Tighten firm but avoid over-screwing to prevent pin compression or misalignment.
- Retest with a short draw. Success looks like steady vapor, no flickering LED, and no misfires.
“Keep contacts clean and seating correct to avoid ‘no atomizer’ errors.”
SOKVAPE pro-tip
Keep devices out of linty pockets and away from keys or coins. Use a case to stop debris and leaks from fouling contacts and triggering connection faults on your vape.
| Step | Action | What to check |
|---|---|---|
| 1 | Inspect contact faces | Sticky e-liquid, lint, corrosion |
| 2 | Absorb and wipe | No visible residue, dry surface |
| 3 | Clean with alcohol | Alcohol evaporated, no film |
| 4 | Reseat carefully | Flush fit, not over-tight |
Step-by-step: Clear airflow blockages in the mouthpiece and air intakes
We walk through simple, safe steps to clear common blockages that cause a tight draw or little vapor. Follow these short checks before disassembly.
- Confirm the airflow slider is open. If the slider is closed, reopen it. This single check often restores normal draw on the device.
- Remove the pod or empty the tank. Ensure the unit cannot fire. Then blow a short, firm breath into the mouthpiece to push debris from the holes and ports.
- Use a rolled paper towel “needle.” Tightly roll a small strip and feed it gently into the mouthpiece to dislodge lint. Do not use metal tools that can damage seals.
- Keep intake holes clear during use. Fingers or fabric can cover ports and mimic a blockage. Check finger placement when drawing.
- Retest with a short draw. If restriction persists, suspect internal flooding or a sensor fault and move to deeper checks.
“Minor dust, condensation, and pocket lint cause most tight draws—start simple.”
Step-by-step: Fix draw-activation sensor problems (auto-draw not firing)
Auto-draw kits rely on tiny airflow switches that fail if e-liquid seeps into the sensor cavity. When liquid floods the detector, the device may light but refuse to fire.
Dry the sensor and clear the detector
- Remove the pod or tank. Set the device upright and power it off.
- Blot excess e-liquid with a dry, lint-free swab. Do not poke metal tools into the chamber.
- Let the sensor area air-dry for 5–10 minutes. Short drying often restores normal response.
Reset technique to recalibrate the sensor
Briefly cover the intake holes with a finger, then take three short puffs. This helps the detector sense pressure again and can reset auto-draw behavior.
Storage tips and final checks
Store devices upright after refill. Horizontal storage drives liquid into airflow channels and causes repeat flooding.
“If flooding recurs, check fill level, seals, and coil fitment; move to coil flood diagnosis if the sensor still won’t respond.”
Quick function check: reseat the pod, test short draws, and if the issue persists, proceed to the flooded coil and coil-priming steps for a deeper fix.
Step-by-step: Diagnose a flooded coil vs. a dry hit
Small clues in sound and taste show whether the coil is soaked or starving for juice. We help separate flooding from dry burns so you can fix the problem fast and safely.
Flooding signs
Listen for gurgling, spitback, or wet crackling.
Notice weak vapor despite open airflow.
Those signs point to excess liquid in the chamber.
Clearing a flood
- Remove the pod or tank if possible.
- Hold the device inverted and blow firmly through the mouthpiece to expel excess liquid.
- Take one or two sharp puffs while still inverted to clear buildup.
- Set the unit upright and let it rest for a few minutes to rebalance wicking.
“Avoid aggressive chain vaping — it can overwhelm wicking and trigger repeat floods.”
If gurgling continues, check coil fitment and seals.
If taste turns harsh or burnt, move to coil health and priming steps.
For related fixes, see our guide on fixing pod problems for best practices to restore a smooth vape experience.
| Symptom | Quick action | Next step |
|---|---|---|
| Gurgle / spitback | Blow through mouthpiece inverted | Let sit upright for minutes; retest |
| Wet crackle | Absorb pooled juice, blow short puffs | Check coil seating and seals |
| Thin vapor | Clear airflow, rest upright | Inspect coil for flooding or dry hit |
Step-by-step: Check coil health, fitment, and Coil Priming technique
Check the coil carefully; a fast inspection separates repairable faults from parts that need replacement. A clear decision early saves time and keeps the device safe.
When to replace
Replace the coil if cotton looks blackened, gives an acrid smell, or weak hits persist after cleaning. These signs mean the wick is scorched or the coil has degraded.
Install correctly
For screw-in types, align threads before turning. Cross-threading damages seals and causes poor contact.
For press-fit pod coils, make sure the coil sits flush with the pod base. A proud coil can misread resistance or leak.
Coil Priming (numbered)
- Add 4–6 drops of juice onto exposed cotton.
- Fill the tank or pod to the recommended level.
- Wait 5–10 minutes for saturation.
- Take 3–5 unpowered puffs, then fire at low wattage.
Poor priming leads to instant dry hits and can permanently scorch wicking.
Mesh Coils considerations
Mesh Coils ramp fast and need even saturation. Use moderate airflow and confirm full juice coverage before high-power testing.
“A correctly seated, primed coil is the fastest path to a reliable draw.”
Quick retest: Reinstall, check device readout, start low on power, then raise gradually. If issues persist, consider a fresh coil as the safest solution.
Step-by-step: Verify wattage/voltage is matched to your coil resistance
Start by confirming the coil’s resistance and the device’s recommended firing range before changing settings. A mismatch is a common silent issue that lowers vapor or scorches the wick.
Find the ohms and match the firing range
- Locate the resistance printed on the coil (for example 0.8Ω or 1.7Ω).
- Check the device manual or coil box for the recommended wattage/voltage range.
- Set your device to the lower end of that range first.
- Take a short test puff and watch for normal vapor and taste.
- Increase in small steps if needed, allowing 10–15 seconds between adjustments.
Underpower vs. overpower symptoms
Underpowering shows as weak clouds and cool, wispy draws. Juice may pool because it never fully atomizes.
Overpowering gives hot, harsh hits, a burned flavor, and fast wick degradation even with a full tank.
Pro-tip: adjust gradually
Raise power slowly. Small jumps protect cotton and avoid sudden scorching. Remember airflow interacts with output—more power usually needs more airflow for a comfortable draw.

“Match resistance, power, and airflow for the safest, most reliable way to restore normal performance.”
Retest the device after each change. If thick liquids still struggle, move to section 14 on viscosity and temperature fixes.
Step-by-step: Fix thick oil or high-VG juice flow problems
Cold weather can thicken oil and slow the wick, cutting output on some pens. Thicker juice resists capillary action. The coil then runs lean and clouds shrink.
Why cold temps stiffen liquid
Lower temperature raises viscosity. Thicker oil and high-VG juice move slower through small wicking ports. That slows saturation and causes weak draws.
Safe warming routine
- Hold the device in your warm hands for 3–5 minutes. This is the lowest-risk method.
- If needed, place the kit near a warm water bag for 2–4 minutes. Keep batteries away from direct heat.
- Use a hair dryer on low at a distance of 12–18 inches for brief bursts only. Check heat at each step.
- After warming, let the device rest upright for a minute, then take a few short puffs to test flow.
PG/VG ratio and port fit
Match juice thickness to your device. Small wicking ports prefer higher-PG blends. Dense oils and high-VG formulas need wider ports or higher voltage to atomize safely.
“If hits improve after gentle warming, viscosity was likely the issue; otherwise return to airflow, contacts, and coil checks.”
Disposable vs. refillable troubleshooting: what’s different and what’s the same
A short checklist saves time: determine if the unit is disposable or refillable before any hands‑on fixes.
Disposable kits have strict limits. Many are sealed. If the battery or e-liquid is spent, replacement is the right choice. Rechargeable disposables may need charging, but non‑rechargeable models cannot be revived.
End‑of‑life signs for disposables include consistent weak vapor, a burned taste with no visible liquid, or refusal to fire after clearing airflow. If those persist, replace the unit.
Refillable advantages
Refillables let us replace coils, deep‑clean contacts and tanks, and adjust power to match coil resistance. These options make repairs cost‑effective and extend life.
Shared fixes and cartridge advice
- Clean and reseat cartridges and contacts before any replacement.
- Avoid over‑tightening to prevent misaligned pins and bad connections.
- Start with cheap steps: clean, reseat, charge — then decide if replacement is needed.
“Know your kit’s limits so you don’t waste time on fixes it can’t support.”
If you’re unsure which category your setup fits, we can help identify compatible coils, cartridges, and safer long‑term options at Sokvape.
Travel and compliance notes for vapers in the United States
Legal Disclaimer: Rules and enforcement change frequently. Federal, state, airport, and carrier policies may differ in 2026. This guidance is informational, not legal advice. Confirm current TSA/FAA and local rules before you travel.
TSA/FAA and carry-on best practices
Keep safety first. The TSA and FAA recommend carrying devices and spare batteries in your carry-on, not checked baggage, due to fire risk. Store batteries in a proper case and power off devices before screening.
| Carry-on | Checked bag | Why it matters |
|---|---|---|
| Allowed: devices, spare batteries in protective case | Not recommended: batteries and charged devices | Fire risk and limited access during flight |
| Keep tanks upright, sealed | Pressure and temperature changes can cause leaks | Prevent flooding and sensor faults |
| Follow airline rules for quantity | Some carriers may confiscate items | Policies vary by carrier and airport |
PACT Act awareness and purchasing
The PACT Act imposes shipping restrictions for certain products within the United States. That affects how you can order and receive replacements. Plan ahead for shipments and verify seller compliance.
Packing checklist
- Power off and lock the device; remove or protect the mouthpiece.
- Keep pod or tank upright and sealed to avoid leaks.
- Store spare batteries in a certified protective case to prevent shorting.
- Carry devices and batteries in carry-on luggage, not checked baggage.
“A small case and upright storage cut leak risk and keep devices ready on arrival.”
Sokvape pro-tip: Use a rigid battery case and keep your tank upright during transit. This simple move prevents leaks, sensor flooding, and messy connector contamination.
Conclusion
Use this short recap to run through the most reliable fixes in order and stay safe.
Follow these steps: charge → open airflow → clean contacts/510 → reset draw sensor → clear flooding → replace or prime coil → match wattage → warm thick oil if needed.
If you see heat, swelling, or a burning smell, stop use immediately and replace the battery or kit. Safety beats a hurried fix every time.
Regular tank and contact cleaning prevents repeat faults. For help matching coils or selecting a PG/VG mix that will wick reliably, Sokvape can assist so you get a better experience and fewer service times.
People Also Ask
Q: How fast should I charge before retesting? — A: 15–20 minutes for most kits; then reseat and test.
Q: What clears a tight draw? — A: Open airflow, clear mouthpiece, and blow short puffs to dislodge lint.
Q: How do I fix a flooded coil? — A: Invert, blow out excess liquid, let sit upright, then retest.
Q: When should I replace the coil? — A: Burnt taste, dark wick, or persistent weak output after cleaning.
Q: When is device end‑of‑life a likely solution? — A: Repeated misfires, battery swelling, or failed charging after safe checks.
 English
  German
  Dutch
Dutch  Danish
  Czech
Czech  Italian
  Slovenian
  French
  Hungarian
  Spanish
  Polish