

How to unlock a Geek Vape is a common query when a device stops firing or won’t accept adjustments. We open with the fastest universal method: five quick presses of the fire button on many models. This approach often solves simple fire-locks without tools.
We focus on safe handling for adult users 21+ in the United States. The intro previews hands-on testing notes, a spec checklist (mAh, ml, nic %, coil type, USB‑C), and a value comparison against Geek Bar, Lost Mary, and Raz.
We define what “locked” means, cover Aegis-style mods and common button locks, and show model-specific sequences like slide-switch and touch unlocks. If unlocking fails, we outline battery checks, contact cleaning, soft resets, and firmware steps.
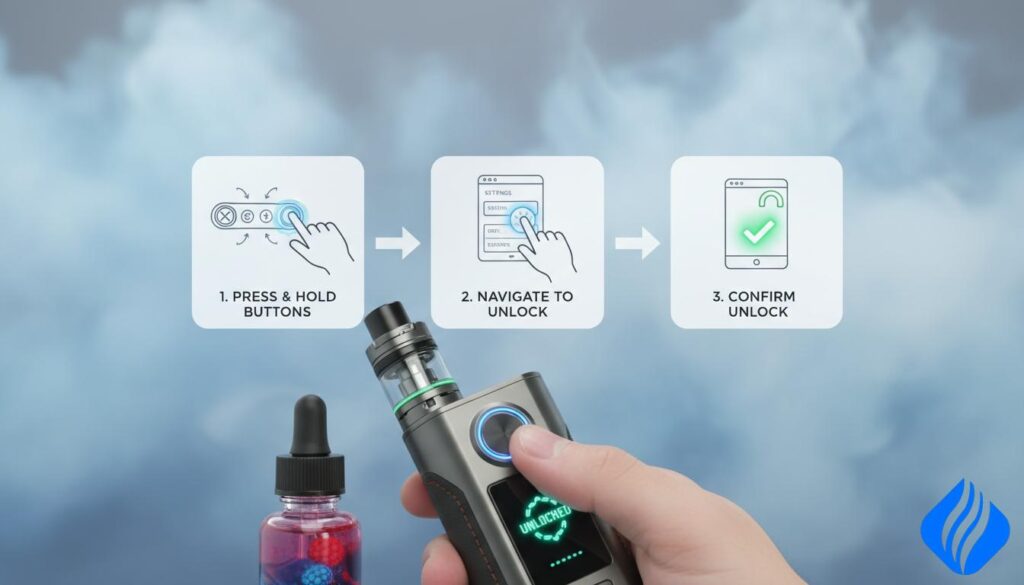
Our goal: keep pockets safe, cut accidental wattage shifts, and give clear next steps for repair, testing, and authenticity checks.
Key Takeaways
- Most devices unlock with five rapid fire-button clicks.
- We test pocket reliability and compare puffs-per-dollar against competitors.
- Spec checklist includes mAh, ml, nicotine %, coil type, and USB‑C.
- If unlocking fails, check battery, clean contacts, and try a soft reset.
- Content is for adult vapers (21+) and prioritizes safe handling and authenticity checks.
Why Your Geek Vape Is Locked and What That Feature Protects
Locks exist to reduce risk. They stop accidental activation in a pocket, purse, or backpack. They also help save battery by limiting activity after periods of inactivity.
We separate intentional locks from accidental ones. Intentional locking is a user action. Accidental locking can happen from repeated button presses during carry.
Some devices show a clear cue on the screen: a lock icon or the word “Locked.” Other models disable specific controls instead of the whole device.
Accidental pocket firing vs. intentional device lock
Accidental firing occurs when buttons snag on keys or fabric. An intentional lock protects against that. Confirm lock status before pocketing to avoid surprises.
Battery-saving and auto-lock behaviors on Geek Vape devices
After set periods of time, many models reduce responsiveness. This feels like an auto-lock and preserves charge.
Different lock types: firing lock vs. adjustment/button lock
Two families exist:
- Firing lock — device will not produce vapor.
- Adjustment lock — firing still works but wattage and menus are blocked.
| Lock Type | What It Stops | Common Screen Cue |
|---|---|---|
| Firing lock | Prevents coil activation | Lock icon / “Locked” |
| Adjustment lock | Blocks wattage and menu changes | Icons or dimmed buttons |
| Physical switch | Quick manual on/off | On/Off marker on body |
Practical habit: always check locking unlocking status before travel or storage near keys and coins.
How to Unlock a Geek Vape Using the Fire Button
We start with the most reliable sequence and the display signals that confirm success. Follow these steps before you attempt other resets or contact support.
Five quick presses: universal method
- With the device powered on, press the fire button five times quickly.
- Make each press distinct and complete within about 1–2 seconds total; do not hold.
- Pause briefly, then check the screen for a lock icon or an “Locked” / “Unlocked” message.
If five presses do not change the state, some Aegis-style models use two or three taps. In those cases the menu may open instead. Menu access indicates an adjustment lock or alternate shortcut rather than a firing lock.
What the screen should show and a quick decision rule
Look for a lock symbol, “Locked” text, wattage highlight changes, or a visible menu. If the device will not produce vapor, treat it as a firing lock. If it vapes but settings stay fixed, treat it as an adjustment lock.
| Press Pattern | Typical Result | Screen Cue |
|---|---|---|
| Five presses quickly | Lock/unlock or power toggle | Lock icon / “Locked” / “Unlocked” |
| Two or three presses | Menu or mode access | Menu list or settings screen |
| Long hold | Power on/off or confirm action | Power animation or shutdown text |
Safety note: After a successful lock unlock, take one short test puff only if the coil and pod are properly installed. For related troubleshooting, see our guide on fixing a blinking vape.
Unlock Methods for Aegis Mods with a Slide Switch or Touch Unlock
Aegis devices use either a mechanical slide switch or a touch unlock system; each reports its state on the screen.
Slide switch workflow: Locate the physical lock switch on the side. Slide it across and watch the screen for “Locked” or “Unlocked.” Verify the message before pressing the fire button.
This switch usually locks firing immediately. That makes it reliable for pocket carry. It can act independently of on‑screen settings.
Touch unlock on Aegis Legend 3
The Legend 3 uses grip detection via a soft panel. The device must sense your hand to allow firing. If you wear gloves, the sensor may not register contact and the unit will not open consistently.
Disabling touch unlock in Lock Settings
Open the menu by pressing the fire button three times. Select Lock Settings, then change the unlock behavior to disable touch unlock. Some models require a short hold fire in submenus to confirm.
Verify: After any change, confirm you can both fire and adjust wattage without a lock prompt. This completes safe unlocking and locking unlocking checks.
If It Still Won’t Unlock: Troubleshooting and Reset Options
Begin with power checks: a drained or misinstalled cell often mimics a locked state. Confirm charge level, proper polarity for removable cells, and clean, dry contacts before any button work.
Battery checklist:
- Confirm charge on the screen or use a charger.
- Reseat cells and check spring contacts for corrosion.
- Try a known-good cable or power source for USB‑C models.
If the fire button or other buttons stick, use gentle cleaning. Apply a small amount of isopropyl on a cotton swab. Avoid pouring liquid into seams. Let the unit dry fully before power up.
Adjustment button lock: If the device fires but wattage won’t change, hold “+” and “-” together. If that fails, open the menu and set Button Lock to Unlock.
Soft reset vs. factory reset: A soft reset reboots state and keeps most custom settings. A factory reset restores defaults and may erase wattage profiles and lock preferences. Model behavior varies; consult the manual.
Common reset combos include multi‑button holds (fire + + + –) or menu reset paths (fire x3 > Reset > Confirm). If behavior stays inconsistent, check the manufacturer website for firmware updates. Do not install unofficial firmware.
Stop condition: If the device heats unexpectedly, auto‑fires, or shows errors after resets, discontinue use and consult the manual or a qualified service. For a detailed procedure, see our detailed guide.
| Symptom | Likely Cause | First Action |
|---|---|---|
| Dim or blank screen | Low battery / poor contact | Charge and reseat cells |
| Buttons unresponsive | Residue or mechanical fault | Clean gently; dry fully |
| Fires but settings frozen | Adjustment lock active | Hold + and – or change menu lock |
Hands-On Testing Notes: Throat Hit, Vapor, and Real-World Lock Reliability
Our testing places a pocketed mod through everyday motion while we log lock behavior and button response. We pocket-carry the device during errands and check if the lock prevents unintended fire events when pressure hits the button.
We measure accidental presses, lock cue readability, and whether unlock sequences register after repeated handling. Results are recorded over multiple runs and varied carry positions.
Throat hit and nicotine strength
At 2% nic salt the throat is generally smoother at similar airflow. At 5% nic salt the hit feels stronger and sharper, especially when increasing wattage.
Coil style and vapor
Mesh coil heats evenly and keeps output consistent. Dual mesh raises vapor density and perceived intensity. Pushing power above the coil’s spec increases warmth and shortens life.
Flavor after extended use
After about 5,000 puffs sweetness and top notes often flatten first. Cooling and base tones can remain, but overall intensity drops as the coil ages. This matches our vaping experience across liquids and airflow types.
| Test Area | Observation | Practical Note |
|---|---|---|
| Lock reliability | Clear on-screen cues, rare accidental unlocks | Best when cue is instantly readable |
| Throat hit (2% vs 5%) | Smoother vs stronger | Adjust wattage within spec |
| Vapor by coil | Mesh: steady; Dual mesh: denser | Dual mesh may fade faster with sweet liquids |
Note: These are observational results from our hands-on testing. Experience varies with liquid, airflow (MTL vs DTL), and user habits. We include these notes to improve reader vaping experience and device selection.
Geek Vape vs. Geek Bar vs. Lost Mary vs. Raz: Value and Flavor Consistency Compared
We break down cost-per-puff and flavor durability for refillable mods versus disposable sticks and pods.
Puffs per dollar: estimating cost per puff
Method: estimate total puffs, then divide by purchase price. For refillable mod setups include coil and e-liquid upkeep. For disposables use the listed puff count on packaging.
Flavor consistency comparison
Refillable setups (mod + pod/tank) keep flavor steady after coil swaps. Mesh or dual mesh coils maintain output longer with fresh e-liquid.
Disposables (Geek Bar, Lost Mary, Raz) often peak early and decline as the internal wick ages. They simplify use but lack lock and adjustment controls.
Spec checklist shoppers compare
| Spec | Refillable mod/device | Typical disposables |
|---|---|---|
| Battery (mAh) | 1000–3000 mAh (replaceable or built-in) | 300–1200 mAh |
| E-liquid (ml) | 2–5 ml (refillable) | 1.3–20 ml (prefilled) |
| Nicotine | 2% or 5% nic salt options | Often 5% nic salt |
| Coil type | Mesh / Dual mesh replaceable | Mesh integrated |
| Charging | USB‑C common | Many now USB‑C, verify listing |
For shopping comparison, visit our Disposable Vapes and Hot Sale pages. For brand filters check RandM and Bang.
Buying-safety: make sure listings show clear nic % and USB‑C info. Prefer verified sellers and avoid vague spec pages.
Conclusion
We offer a compact recap that highlights the fastest paths and safety priorities.
Start with the five-press fire button method and check the screen for a lock change. If that does not clear the state, confirm whether this is a firing lock or an adjustment lock, then use the slide switch or menu settings as applicable.
Follow troubleshooting in order: power and battery first, inspect buttons and contacts, try a soft reset, then consider firmware. This sequence protects the device and reduces risk.
See our comparison section for value and flavor notes, and consult the upcoming FAQ for empty detection, recharge guidance, and authenticity checks. For model-specific steps visit our detailed guide at device unlock guide.
Nicotine is an addictive chemical. This content is for adults 21+ only. Keep products away from children and pets. If you do not use nicotine, do not start.
 English
  German
  Dutch
Dutch  Danish
  Czech
Czech  Italian
  Slovenian
  French
  Hungarian
  Spanish
  Polish